
Audio Interface Basics – What it does
To record your voice with your computer, you’ll need an audio interface. In your VO studio or recording setup, the audio interface does two things: (1) it amplifies the analog signal received from your microphone and (2) it changes the continuous analog voltage into digital 1’s and 0’s so your computer can deal with it. The most common voiceover recording setup connects a Large Diaphragm Condenser microphone through an XLR cable to a separate Audio Interface which then connects to the studio computer through a USB cable.
Even a USB-Direct-Connected microphone contains an audio interface. In that case, those connections and the interface just happens to live inside the housing with the rest of the mic innards.
In both cases, you create your voiceover performance by moving air molecules, which creates a change of pressure (how we perceive sounds). Those get captured by the sensitive capsule or diaphragm in the microphone. Those pressure changes get converted into tiny fluctuations of electrical voltage and run through some circuits in the microphone, before getting amplified a bit more and then turned into digital information our computer can handle.
However, I often downplay that piece of equipment when describing the basics of home voiceover studios. While the Audio Interface is an integral part of the audio signal path, it does not tend to have a significant impact on overall sound quality in VO recordings. That’s because even the “entry level” interfaces do a pretty phenomenal job of handling the basics of amplifying the microphone input and then digitizing that signal into our computers.
When it comes to recording equipment, we live in a time of riches. Even more so with Audio Interfaces.
Audio Interfaces are seldom a bottleneck
As with voiceover microphones, we’re always looking for “the best audio interface” in the home VO recording studio. As with every piece of equipment, you’ll hear all kinds of advice. You may be told that a recommended XLR microphone model needs a special preamp. Or, you may hear about something called a “sound card” and be wondering if that is a better approach.
As with any audio equipment, we can descend into a deep rabbit hole of various models and features. But for most of what we do in VO, the audio interface can be pretty simple. It’s is generally not the bottleneck in getting great audio in your voiceover auditions and produced work.
Definitions: Sound Card v. Preamp v. Mic Pre
First, a few terms that mean essentially the same thing: you may hear people refer to “Sound Cards” or “Preamps” or “Mic Pre’s”. If they are referring to the device that sits at the end of your XLR cable and connects to your computer via a USB cable, then they are talking about an audio interface.
Other terms used to describe an audio interface include: “A/D” or “A to D” (for audio to digital), “DAC” (digital audio converter), or just “Converter”. Generally, people are referring to the same piece of gear.
To be completely accurate, Sound Cards are dedicated circuit boards that plug directly into a slot inside of your computer. This type of hardware harkens to the days when it was more common to remove the case from your computer and directly install specialty hardware to give it more functionality. These days, we just connect a self-contained external device through a high speed data cable, such as USB. The benefit is that we no longer have to worry about whether upgrading our computer makes our plug-in cards obsolete.
Preamps or Mic Pre’s are kind of describing the same thing – an amplifier which takes the relatively low output from a microphone and boosts it up to a level that is useful when recording. Almost any audio interface you are likely to encounter will have a Preamp inside of it, in addition to the converter circuit. But, that does not prevent people from referring to an audio interface as their “Pre”.
What is an Audio Interface?
An Audio Interface does what a “Sound Card” used to do – first amplify and then convert the incoming analog signal into 1’s and 0’s that the computer can deal with. Because they are external, self-contained devices, they just need to follow the easier guidelines of data transfer through a digital cable rather than how to be physically connected to a computer motherboard. That keeps things simple for us.
These days, most audio devices are “Class Compliant” – meaning that in many cases (particularly on the MacOS side of things) you won’t need to worry about separate “driver” software. They are just plug-and-play. (Note – Windows users typically need to be aware of how to find the “driver” software for their interface).
Does An Audio Interface Actually Influence Our Audio Quality?
Honestly, I tend not to worry too much about this part of the input chain, preferring to keep things simple. In almost every case, the quality of our audio recordings are much more highly influenced by three other factors:
- The source (the timbre and volume of your voice)
- The room (which will act upon the sound in fairly complex ways)
- The microphone (remember, microphones are basically filters)
Current Audio Interfaces are seldom the bottleneck to high quality audio.
What does an Audio Interface actually do?
As I mentioned above, an Audio Interface receives analog (voltage) input from the microphone through the XLR cable. Once inside of the audio interface, a preamp circuit amplifies that input (typically by 40 to 60 dB of gain – which means that they are designed to handle the input from a condenser microphone). The interface’s converter chips analyze the fluctuating voltage and change it into digital information for the computer in real time. This information travels down the data cable (commonly a USB or USB-C cable) where your recording software records it and renders cool waveforms to your screen.
Many interfaces provide a “Direct Monitor” option, so you can hear the audio as it comes into the interface, before it is digitized. That way, you can hear yourself with no time delay. Sometimes the controls for Direct Monitoring are (1) a switch on the device, (2) a “Mix” knob which balances between the audio coming back from the computer and the input from the microphone, or (3) a software control panel where you might set those things through your computer.
The Audio Interface also handles conversion during playback. It makes sense of the digital data from the computer, converts that back into a voltage signal which goes into our headphones or speakers. This audio output uses the high quality converters and amps in the interface, and often sounds better than the audio coming out of the headphone port on your computer.
All of audio input generally occurs with very little change to the signal. What we end up with is an accurate transfer of our voice through the microphone and into the recording software.
Audio Interfaces: Can Distortion Sound “Good”?

Just what happens when we use it?
Every voiceover studio must have an Audio Interface. It handles the vital step of transferring performances from the microphone into the computer. While the mic is the primary filter between your voice and the recording software, everything travels through the audio interface.
When Is “Distortion” a Good Thing?
Audio Interfaces recommended for VO studios generally have a “neutral” sound. That means the signal coming out of the interface remains very, very similar to the signal which went into the interface. It will be louder – thanks to the preamp circuit – but it shouldn’t sound different. That means there’s no “coloration” of the sound.
Any coloration of the incoming audio is actually distortion of that signal. Which on the face of it is a bad thing, right? We want to avoid distorting our audio signal, don’t we? That’s why we record conservatively, practice mindful mic placement and position, correct?
Yes. Yes. And yes. Those things are true.
For VO, we certainly don’t want significant general distortion on our voice recordings – clarity and accuracy is the point. Yet “controlled” distortion might add some sonically pleasing aspects to our sound – adding overtones or “harmonics” to the original signal which compliment it.
That’s where the “boutique” preamps come in. By judiciously adding coloration or tonal changes by boosting certain specific harmonics in the original signal, those preamps add extra tonality which our ears find pleasing.
Using a Specialty Preamp for VO
This “secret sauce” is why some voice actors choose to invest in a separate preamp – they are using the combination of their microphone AND that preamp to create their core tone. When you get to that point, of course, you need to (a) know what you are doing, and (b) have clients who want that specific tone from you.
Which brings us back to the basics of running your VO studio – most of what we deliver to our voiceover clients are neutral, clean, vocal recordings. We need to be able to do that consistently.
As with many things, there’s a balance to maintain. The more tonal coloration we add to our recordings, the more “produced” our audio may sound. That may not be appropriate for certain types of projects, or the client may want to shape that tonality on their end. Many actors’ voices tend toward an “announcery” quality to begin with, and adding additional character from a preamp often increases that. How many audition opportunities ask us to “not sound like a voice actor”? All of those considerations factor in to what we add to our core tone.
Adding “Character” to the Input Signal
When we are aware of those potential downside, some distortion might be a good thing – and a few of the Audio Interface manufacturers understand that. Most of the companies who make audio interfaces have been in the recording studio equipment business for a long time, and have a heritage of making the recording consoles found in high end professional studios. Recording engineers might favor a given type of console (if you’ve seen the documentary “Sound City”, they are moving a Rupert Neve console to Dave Grohl’s studio). In addition to the core functionality of clean, neutral preamps, certain audio interface models try to capture some of that feel with an additional tone option.
Focusrite, through the “Air” circuit on their Scarlett series; Solid State Logic, with the “4K” button on their SSL 2 and SSL 2 Plus models; and Universal Audio, using a “Vintage” option on their Volt series, all provide a simple button to add some of that coloration to the signal. Think of it as a slight bit of sonic “signature” that can be added.
What’s nice about these particular interface models is that those sonic options have been set up by folks who know what they are doing. They are designed to be a more subtle enhancement of the signal. Since they are activated by buttons, they are also either “ON” or “OFF” – which makes it impossible to set something wrong.
If it’s appropriate to your workflow, you can provide a client samples with and without that option and let them decide which they want to receive from you.
Remember – You can’t Unbake the Cake!
When using any inbound processing like those coloration circuits, the original signal into your computer is being directly modified. With some interfaces we’ll discuss below, you may be able to still record a raw, unprocessed signal. But, the interfaces above do not let you do that. You will be recording that processed signal. In that case, any processing you add on the way in will become part of the recording and cannot be removed. You can always add processing in software.
Audio Interface Features and Options

Because our Audio Interfaces connect microphones to recording computers, they must have cables attached to them. And, since we will be always be adjusting settings, controls need to be easily accessible.
As basic as that sounds, the manufacturer’s choices of where to locate those controls and how to attach various cables can make a noticeable difference in studio workflow. Directly moving knobs, sliders or buttons remains the most common method of adjusting settings. Having a clean and simple control panel with easy-to-adjust settings lets you focus upon the performance with no fumbling.
For home-based voiceover studios, the most common Audio Interfaces are desktop models laid out in one of two ways:
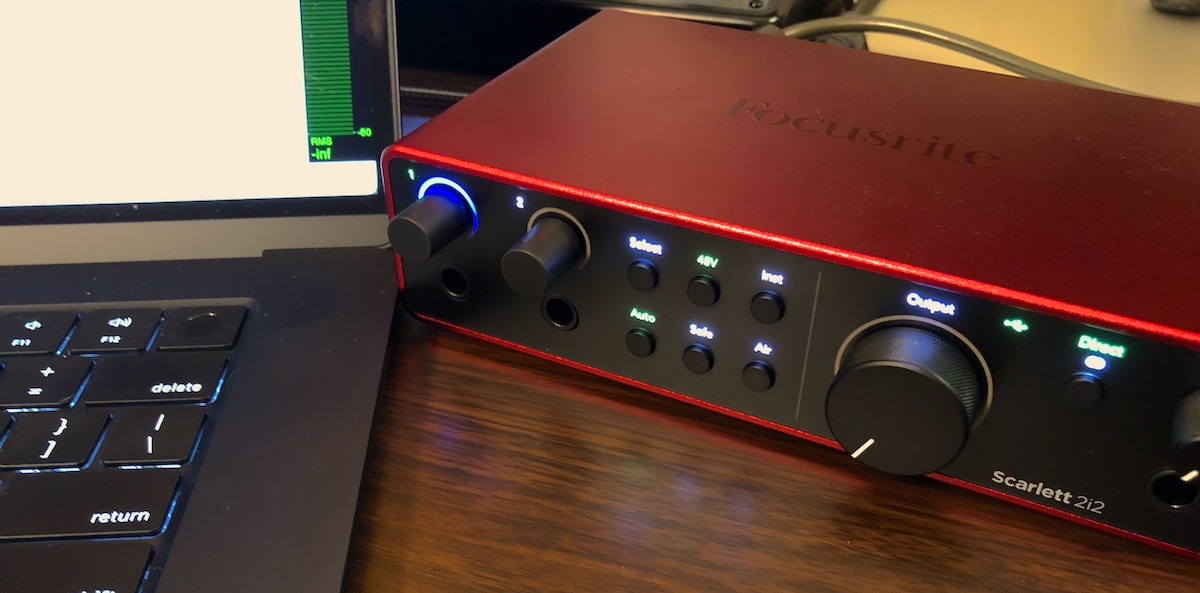
- Front Panel Routing Designs: (as with the original Scarlett 2i2 in the image above – the current models have actually shifted to rear panel XLR routing) Audio cables attach and settings are adjusted on the face of the unit.
- Back Panel Cable Routing: (like the SSL 2 Plus shown below) Audio cables attach at the back and controls are on the top of the interface. This similar to mixers and consoles typically found in more complex studios.

In some cases interfaces are controlled by software through the computer. If that is the case, the interface manufacturer will supply the control app, typically available to you via download when you register the device. Usually, the software “console” app provides access to deeper settings and more complex setup items.
Location, Location, Location… Where to put the Audio Interface
My recommendation has generally to leave the audio interface “out of the booth”* – for two reasons.
First – USB, USB-C, or Lightning data cables generally need to be shorter than XLR audio cables. You could easily run an XLR cable 50 – 100 feet without having noticeable degradation of the audio signal, but there are specific length limits for digital cables. Long data cables introduce the possibility of dropouts and glitches.
Second – and this is more of an aesthetic bias – for most voiceover work, there’s little reason to have the interface nearby. If you are setting appropriate input levels, there’s no need to be actively tweaking input knobs when recording.
*The reason I say “out of the booth” is that until the recent advent of Apple’s M-series chips, computers tended to be noisy beasts with audible cooling fans and spinning hard drives. The silent operation of newer computers is a boon to voice actors everywhere.
Laying Things Out – Cable routing and control surfaces
Consider the physical layout of your interface. While I’m incredibly happy with the amount of hours my Gen1 Focusrite Scarlett 2i2 provided (and keeps providing), the control panel layout causes the microphone cables to jut out to the front of the unit.
That meant I sacrificed a bit of desktop real estate to the connections and cable loops. It also made it slightly fiddly to get at the input knobs for each channel. The rear panel routing and more separated controls of the SSL 2+ cleaned things up significantly.

How Many Inputs?
Most home-based VO studios have only a single microphone, and an interface with a single input lets you happily get to work. However, for a few dollars more, there typically exists a two input model of the same unit.
If you ever want to add another mic, having that second input simplifies things. Also – since the second input has its own separate preamp, that provides a backup if the first one fails. The minor increase in price is cheap insurance. It also lets you have a second microphone at your desk if you are doing Remote Connected sessions.
Plug This Into That – current Audio Interface connectors
Most interfaces now use a USB-C connection – the smaller plug design that supports higher data transfer speeds. In order to accommodate older computers, some interface models ship with a cable that goes from USB-C on the interface to a USB 2.0 connector (the older, rectangular-shaped connector) on the other end. If not, converters are readily available. Note that USB-C actually has the same connector shape as Thunderbolt – so sometimes it gets a little confusing. You can plug a USB-C device into a Thunderbolt port, but it won’t be able to use the faster data rates that Thunderbolt supports. (More about Thunderbolt here.)
Will It Work Tomorrow?
These days, electronic devices are typically built by manufacturing contractors. That’s why we can get amazing products for very low cost. The downside is that maintaining consistency, controlling the variables of components, and keeping quality high can be difficult. If some subcontractor supplies a sub-spec part or the manufacturing tolerances are not met, the result is often bad production runs of certain makes and models. While no company is immune, some do seem to have more of an issue with this than others.
Reliability is a key feature in your studio.
I would rather have a slightly less flashy piece of gear that worked every day.
Recommended Audio Interface Models for Voiceover studios

Any of these audio interface models could work well at the center of your voiceover recording studio. Though they could be described as “simple” audio interfaces (as opposed to models which have more complex routing features and processing options described further on), all of them have mic inputs with 48V Phantom Power and supply appropriate gain for the condenser microphones used most commonly in VO.
Recommended Interface Models: SSL2 Mk II or Focusrite Scarlett 2i2 Gen4
Of the models in this group, I prefer the SSL2 MKII, as it provides a nice control layout that I find comfortable to use and has rear panel routing for cables, though I find myself constantly recommending the Gen4 Focusrite Scarlett 2i2 for the auto-gain setting feature and the really well thought out “SAFE” mode.
Note – as of summer 2026, SSL has released a one input version of their proven interface called the SSL1. This has a regular retail price around $159US, which makes it an excellent “intro” level interface. Physically, it is very similar to the SSL2 with the same control layout and connections. It also has the High Pass Filter and “4K” coloration circuit which can easily be engaged with a lighted switch.
The models below can currently be purchased in the $100 – $300 (USD) range. All are “bus powered” – meaning they draw their operating current from the USB cord, though the Scarlett 2i2 Gen4 model also allows the use of a separate power supply. Laptop or desktop computers provide appropriate power to all of these. A separate power adapter can solve certain types of setup issues – for example if trying to use an iPad as the recording device, or if you want to reduce the draw on a laptop battery.
One feature I haven’t mentioned yet is audio “loopback” which gives the ability to playback recorded audio through the interface (sometimes this is described as “streaming” audio). This can be beneficial in some directed session situations where playing back recordings to a remote director might be a bit cumbersome. Models with loopback are noted below.
While some interfaces come bundled with recording software packages, it’s important to note that all audio interfaces will work with any standard recording software in your computer. You do not need to use the specific recording software which comes with any of these (though Windows systems typically require installing a device-specific software “driver”).
Recommended Desktop Audio Interfaces: My Top Two
Focusrite Scarlett Series – 2i2 Gen 4

These ubiquitous red boxes seem to be on the desk of many VO studios. There’s a reason for that: Scarlett models are simple to set up, have clean, neutral preamps and work consistently. Focusrite recently revamped this venerable and proven model to the “Generation 4” while adding a number of solid features.
New in the Focusrite Scarlett 2i2 Gen4:
- Improved microphone preamps with nearly 70 dB of gain – that will work with most dynamic microphones as well as condensers
- Higher headphone output
- Refined routing of XLR cables so they connect on the back of the unit, keeping your desk clean
- Auto-Gain setting – simply speak into the mic and it will set an appropriate input level
- “Safe” mode to prevent clipping
- “Control 2” software lets you adjust gain, playback, and other features
- Revised LED halos for both input and output confirms operation.
Focusrite Scarlett 2i2 Generation 4 – two mic inputs – manufacturer’s site – purchase

What about the Scarlett Solo?
Unfortunately, Focusrite did not put most of these features into the Gen 4 Solo model, and in my view that makes the Solo much less useful for voiceover/narration/podcasting projects. Therefore, I no longer recommend it. I’d strongly encourage spending a little more money (~$50US) and getting the Gen 4 2i2 model.
Another strike against the Solo
Additionally, the Focusrite Solo Gen4 uses an odd hardware routing structure for the input. This causes the MIC input to show up on channel 2. While Twisted Wave and most recording software can change input selections easily, Audacity does not currently do this, leading to a convoluted process for recording a mono VO track. Focusrite has actually upgraded the firmware for this interface which can combine both inputs into a single digital signal, but that can cause other problems.
New sub-$200 option – the SSL1
As mentioned above, SSL has realeased the SSL1, with a single microphone preamp and a “Line” level input (for guitar or other instrument). This has the same clean 32-bit/192 kHz A/D chips found in the SSL2. If you are working with a smaller budget and don’t feel the need for a second microphone input, this is a compelling option. manufacturer’s site – purchase
Solid State Logic SSL 2 / 2+ MkII

Solid State Logic (SSL) is a company with a long history of quality studio consoles – the impressive mixing boards you see in high end recording facilities. My main interface for the past few years has been the SSL 2+. I prefer the solid feel of the controls and highly ergonomic layout. My only complaint has been the lack of a status light under the 48V phantom power button. Newly realased in 2024, the “Mk II” version ends that complaint and brings more functionality to this solid model.
The SSL 2 and 2+ Mk II models now feature a High Pass Filter option on the interface (with lighted indicators!) and has upgraded the Analog-to-Digital converters to 32 bit (note – this is not a 32 bit float system). The SSL2 has added a second headphone output jack. Both models have two mic inputs and a “4K” button for tonal options (it’s designed to have coloration similar to the 4000 series of their recording consoles). The “+” (Plus) model adds MIDI ins & outs for musical instruments and has a second headphone and speaker output. Both models now have a significantly louder headphone output. SSL has refined this model nicely.
The SSL2 series has become my most often recommended audio interface.
SSL 2 MkII – manufacturer’s site – purchase
SSL 2+ Mk II – manufacturer’s site – purchase
Quite possibly the real reason I like the SSL 2 Plus – it goes up to 11…


Other Audio Interface Models to Consider

Audient ID4 MkII / ID14 MkII (above left) – and don’t forget the ID24!
I generally like Audient products. They lay out in a similar fashion to the SSL2 MkII’s – giving more of a “mix console” arrangement and providing rear cable routing. They seem to have solved the power supply consistency issues that cropped up during the pandemic (many manufacturers suffered QC issues during that time). The EVO line has interesting features – though the housings always feel a bit fragile.
Audient have good quality converters and preamps. The ID series shown here are robust and feel solid in use. One nice improvement on the current “MkII” models is the inclusion of a Loopback option via a software mixer control.
Audient brought out a new ID24 in late 2023 would be a solid choice among their current models if you need additional routing options. The ID24 (confusingly not identified as a “Mk II” even though it replaced another model with the same name) has “direct inputs” which provide the ability to bypass the internal preamps. Bypassing internal preamps is a fairly niche case for most voice actors. However, if you have a tube mic with a dedicated preamp or use a boutique pre to create a specific sound, this is a clean way to bring that signal into your computer.
These two models below would be solid choices.
ID4 MkII – one mic input – manufacturer’s site
ID14 MkII – two mic inputs – manufacturer’s site
Universal Audio (UA) Volt 1 / Volt 2 – (above center)
Released in late fall 2021, this is UA’s approach to a simpler interface (I’ll talk more about their Apollo series in a minute). Similar to “Air” or “4K” options above, these two base models in the Volt lineup have incorporated a “Vintage” button as a tonal option. Note – these interfaces do not support the software plugins found in the Apollo series. Since their release, I only have encountered a few of them in the wild and they seem to function without noticeable issue. As of 2025, I’ve seen a lot of distributors discounting this model, which may be a sign that it will be retired or updated.
Volt 2 – two mic inputs – manufacturer’s site
Volt 1 – one mic input – manufacturer’s site
In the Volt series, Universal Audio also brought out the 176 and 276 models with an onboard Compression circuit designed to mimic a classic 1176 model. While an onboard compressor may seem like a good idea, this compressor only provides a limited number of discrete presets, making models less useful for a basic VO setup.
MOTU M2 / M4 (above right)
Another company that makes higher-end interfaces. I do like the oversized displays on these as a quick reference and they do have the ability to loopback audio to a remote client on MacOS, which is one of the reasons they’ve grown in popularity. But, I have heard a few reports of these failing in odd ways, so I’m paying attention to whether that was just a blip or a wider issue. Both are two input models, with additional output routing on the M4.
M2 – manufacturer’s site
M4 – manufacturer’s site
Audio Interfaces With More Features

As you start spending more money on Audio Interfaces such as the ones below, you aren’t necessarily getting a better quality analog to digital (A/D) conversion. Nor do you see a huge change in the quality of the preamps which are contained in those units. However, you do start adding additional features, which creates a more versatile piece of equipment.
The question is whether those extra options and features inside the audio interface are important within the context of your studio and recording needs of your voiceover studio.
Audio Routing Options – Software Controls
For example, within the Scarlett Series from Focusrite, there are other interface models with more microphone inputs. I used to have an 18i20, allowing me to attach up to eight microphones at the same time. Basically, it’s the equivalent of eight Solos (or four 2i2’s) with a same set of preamps and converters. Most home VO setups have no need for that many inputs.

In the last couple years, Focusrite has “trickled down” software control which used to only be found on the multi-input models. Withe the new Generation 4 Scarlett 2i2 which I mention above, Focusrite includes their Focusrite Control 2 software which gives computer control of the audio signal. It allows the ability to change settings on the attached hardware device through your computer. This is exceptionally powerful if you locate your interface out of immediate reach. I go into more detail in this resource.
What Does Software Control Look Like?
While there can be downsides in relying upon software managed controls. Many interface manufacturers provide a virtual mixing console onscreen which can add flexibility in your routing options.

With so many people currently producing podcasts or streaming content, manufacturers are continuing to add more enhanced software routing options. For example, the now discontinued Presonus io24 Revelator Interface (shown in the image above) has an extremely limited set of hardware controls on the unit itself. Most of the needed settings can only be accessed through the Presonus* Universal Control software. Clearly, this is designed to be controlled mostly software in order to access all the features. RME and Universal Audio also put many of their routing and controls in their software panels.
*As of 2026, Presonus has been rebranded under the Fender name. Fender purchased Presonus in 2021.

Sonic Enhancement Options in Audio Interfaces
These types of interfaces usually allow much more extensive processing of the incoming audio signal. Similar to the “Air”, “4K”, or “Vintage” switches in the Audio Interfaces I mentioned above, these software tools can modify the raw signal from the microphone, adding coloration or effects with completely adjustable settings.
That means it can have a significant impact upon sound quality, so, you need to get those settings right.
While there are ways to record a “dry” signal in addition to the processed audio, it’s important to note that you are generally “baking in” the effects. If your workflow benefits from that, and you understand the settings you are adjusting, this can be a significant workflow refinement.
Like many of the models above, these Audio Interfaces below all have a pair of microphone inputs, plenty for most VO setups. What they add to the mix is a potentially wide tonal palette through input processing and highly versatile software signal routing to send the audio to various places. These last two features are arguably where most of the additional expense comes from.
Audio Interface Models with Advanced Features

Universal Audio Apollo Series Interfaces
Universal Audio (UA) pioneered the idea of firmware plug-in processing modules which live in the interface itself. Working directly with known companies that built the classic hardware found in high end studios, UA created software versions for their interfaces. With the Apollo series, you can access plug-in versions of the Manley VoxBox, API Vision Channel Strip or the Avalon M737 preamp, for example, which are sonically accurate to those devices. You hear the result in real time as you record, thanks to the processing power in these interfaces.
The Solo and the Twin are the most common models found in VO setups. Both have two inputs, but the Twin has more complex monitor outputs, as well as more studio-focused routing and talkback. Both are Thunderbolt 3 connected, rather than USB. (There is a Twin USB model geared for Windows users).
UA Apollo Solo – manufacturer’s site
UA Apollo Twin – manufacturer’s site

RME
RME builds interfaces with incredibly versatile routing and proprietary audio drivers. You don’t hear about these as much in home VO studios, but they are a solid and reliable product with a strong heritage in professional studios.
They are particularly strong in the variety of presets you can create for various routing and processing. If you do other types of recording, or tend to be moving between studios, this can be a powerful asset to your studio. They have an exceptionally logical layout to their routing software.
RME Babyface Pro FS – manufacturer’s site
Mini Mixers As VO Audio Interfaces? I vote “No”…
There is one type of Audio Interface I would avoid for voiceover work – the inexpensive “Mini Mixer” (also referred to as a “Notebook mixer” – many companies make a product like this). Often new voice actors try to use a seemingly budget-friendly USB mixer as their audio interface. For the most part, those hardware units are designed to take audio from a larger number of inputs (certainly more than the 1 or 2 we might need in the VO studio), adjust those audio input levels, process the audio and provide some limited routing options.
These Mini Mixers are equipped to be an inexpensive solution for capturing full bands or live performances. By providing a wide variety of functions at a relatively low price, they must use less expensive components throughout. The typical result is a comparatively noisy input channel for your microphone, which negatively impacts the quality required for voiceover applications.
A Few More Audio Interface Options for Voiceover Studios
Yamaha AG Series with Loopback – AG03MK2 / AG06MK2

This unit is an exception to the above statements about Mini Mixers in the home VO studio. Though laid out like a small mixer, it contains a higher quality preamp and converter circuitry. These models became quite popular as they contain a simple hardware Loopback circuit, allowing you to play audio back to a remote director.
Yamaha AG03MK2 – 1 Mic Input – Manufacturer’s site – Purchase
Yamaha AG06MK2 – 2 Mic Inputs – Manufacturer’s site – Purchase
CEntrance MicPort Pro

The MicPort Pro has long been a favorite of voice actors looking for a compact interface. CEntrance added an analog Limiter which can provide a discrete track on the input in addition to the raw feed. I have a number of video game and animation clients who chose this model simply for that feature. This is a solid option is you are looking for a small size unit that provides pro quality audio.
CEntrance gear is well made and highly functional. They are a smaller company with a very hands-on owner. The only downside is that from time to time, availability can be tricky.
One thing to be mindful of: since this unit is designed primarily for mobile use. The interface always runs from the onboard battery. You can set it up to charge at the same time by using a second USB cord, but if the battery is drained all the way down, there is a delay for a few minutes while it is recharged. It does not come right back “on” when connected to a USB port.
MicPort Pro 3 is available for order on the CEntrance site.
Update: As of January 2025, the PASport VO has finally shipped. I will be digging into mine and sharing insights.
Audio Sigma Mike Hero / Mike Hero DSP

AudioSigma appeared on the scene a couple of years ago with a stunningly small one channel audio interface. If you are looking for high quality in a small form factor, this should be on your list. The Mike Hero has a single input with a clean mic gain for both condenser and dynamic mics, nicely sized control knobs for input and output, and has onboard EQ and a High Pass Filter with switchable options.
The “DSP” model adds a proprietary noise reduction to the input which I found very effective without negatively impacting the source audio. It has been optimized to be powered by current iPhone/iPad models (though it can be powered separately as well). Well thought out and nicely constructed.
AudioSigma Mike Hero – manufacturer’s site
AudioSigma Mike Hero DSP – manufacturer’s site
Audio Interfaces – A Few Final Thoughts
On the topic of Audio Interfaces, I may have created a bit of a cognitive dissonance issue.
I’ve highlighted a range of audio interface models with a variety of interesting features, some of which are not particularly cheap. My hope is that has been helpful to understand what models work consistently in my voiceover studio and those of my VO audio clients.
On the other hand, there’s a consistent undercurrent of “it doesn’t really matter…” threading through my comments above. That gets at the crux of the issue. Unless you are working with a significant budget, it’s helpful to prioritize any investment you make in your voiceover business.
It gets back to priorities. By the time you are ready to upgrade your interface, it would have been helpful to invest first in quality training and then the space in which you record. Those two things remain more significant than even which microphone model you end up using.
In terms of importance, Audio Interfaces sit slightly below all of those things. And these days, you get a lot of usable quality for a fairly modest investment. Even the basic models I’ve mentioned work well – certainly enough to cover voiceover recording tasks.
The main reason I wanted to retire my Scarlett was that it travelled with me to in-person classes, and I was just worried about it banging about in my bag. I couldn’t afford to come back to the studio, plug it in and have it not work. Just to be clear, it is still working just fine after countless hours over many years.
How you use the gear matters as well. Whether more sophisticated routing features, or audio processing tools, matter remains a question that each of us must answer. My bias tends to be toward robust and simple solutions. I’ve found over the years, those types of things tend to fail less and be more easily repaired. With Audio Interfaces, keeping things as simple as possible pays benefits.
Looking for VO-specific Features – two more to watch
There are two other interfaces which might be appropriate for specific voiceover or podcast tasks.
CEntrance PASport VO
This was developed by the team at the Pro Audio Suite podcast and has some very specific features that geared for the working VO Pro. This will get its own in-depth review when I receive mine (there was a limited pre-order period to get the first run built, and I dove in pretty quickly), but there really isn’t anything like this on the market. Dependable analog circuitry with hardware controls of every function. Two interfaces under the hood to allow immediate “mix-minus” feeds during remote sessions. Two mic inputs with silent switching. Full info on the PASport VO page.
Rode Rodecaster Pro II / Rodecaster Duo
Using the Rodecaster Pro II or Rodecaster Duo as a simple VO-only interface barely scratches the surface for what these can do. But if you are looking for a multi-input interface that can do processing, add music and sound effects and act as the center of your podcast or livecasting, take a look at this. The Rodecaster has four microphone inputs, which the Duo offers two. However, there are all manner of ways to bring in remote signals, mix them appropriately and record them to create your production.
Rodecaster Pro II – manufacturer’s site – purchase
Rodecaster Duo – manufacturer’s site – purchase
This resource grew from a series of weekly articles sent to my email community. I’ve aggregated it here and revised some of the content so the information can be shared as a single document. Please let me know if this has been helpful, or if you had any further questions.
If you would like to receive those emails the day they publish, please take a moment to share your contact information through this sign up form.
Thank you
Other of Resources
Recommended Microphones for Voiceover.
I demonstrate features of the Presonus revelator io24 on my YouTube Channel.
Weekly Tuesday Tech Tips and other articles can be found here.
Need setup help, workflow refinement or an audio review? Schedule a Session with me here.
